Documentation Index
Fetch the complete documentation index at: https://docs.3dpreppro.com/llms.txt
Use this file to discover all available pages before exploring further.
When to use this
- Adding a name to a figurine’s base
- Putting a serial number or version on a part
- Branding or logo placement
- Custom text on gifts or personalized prints
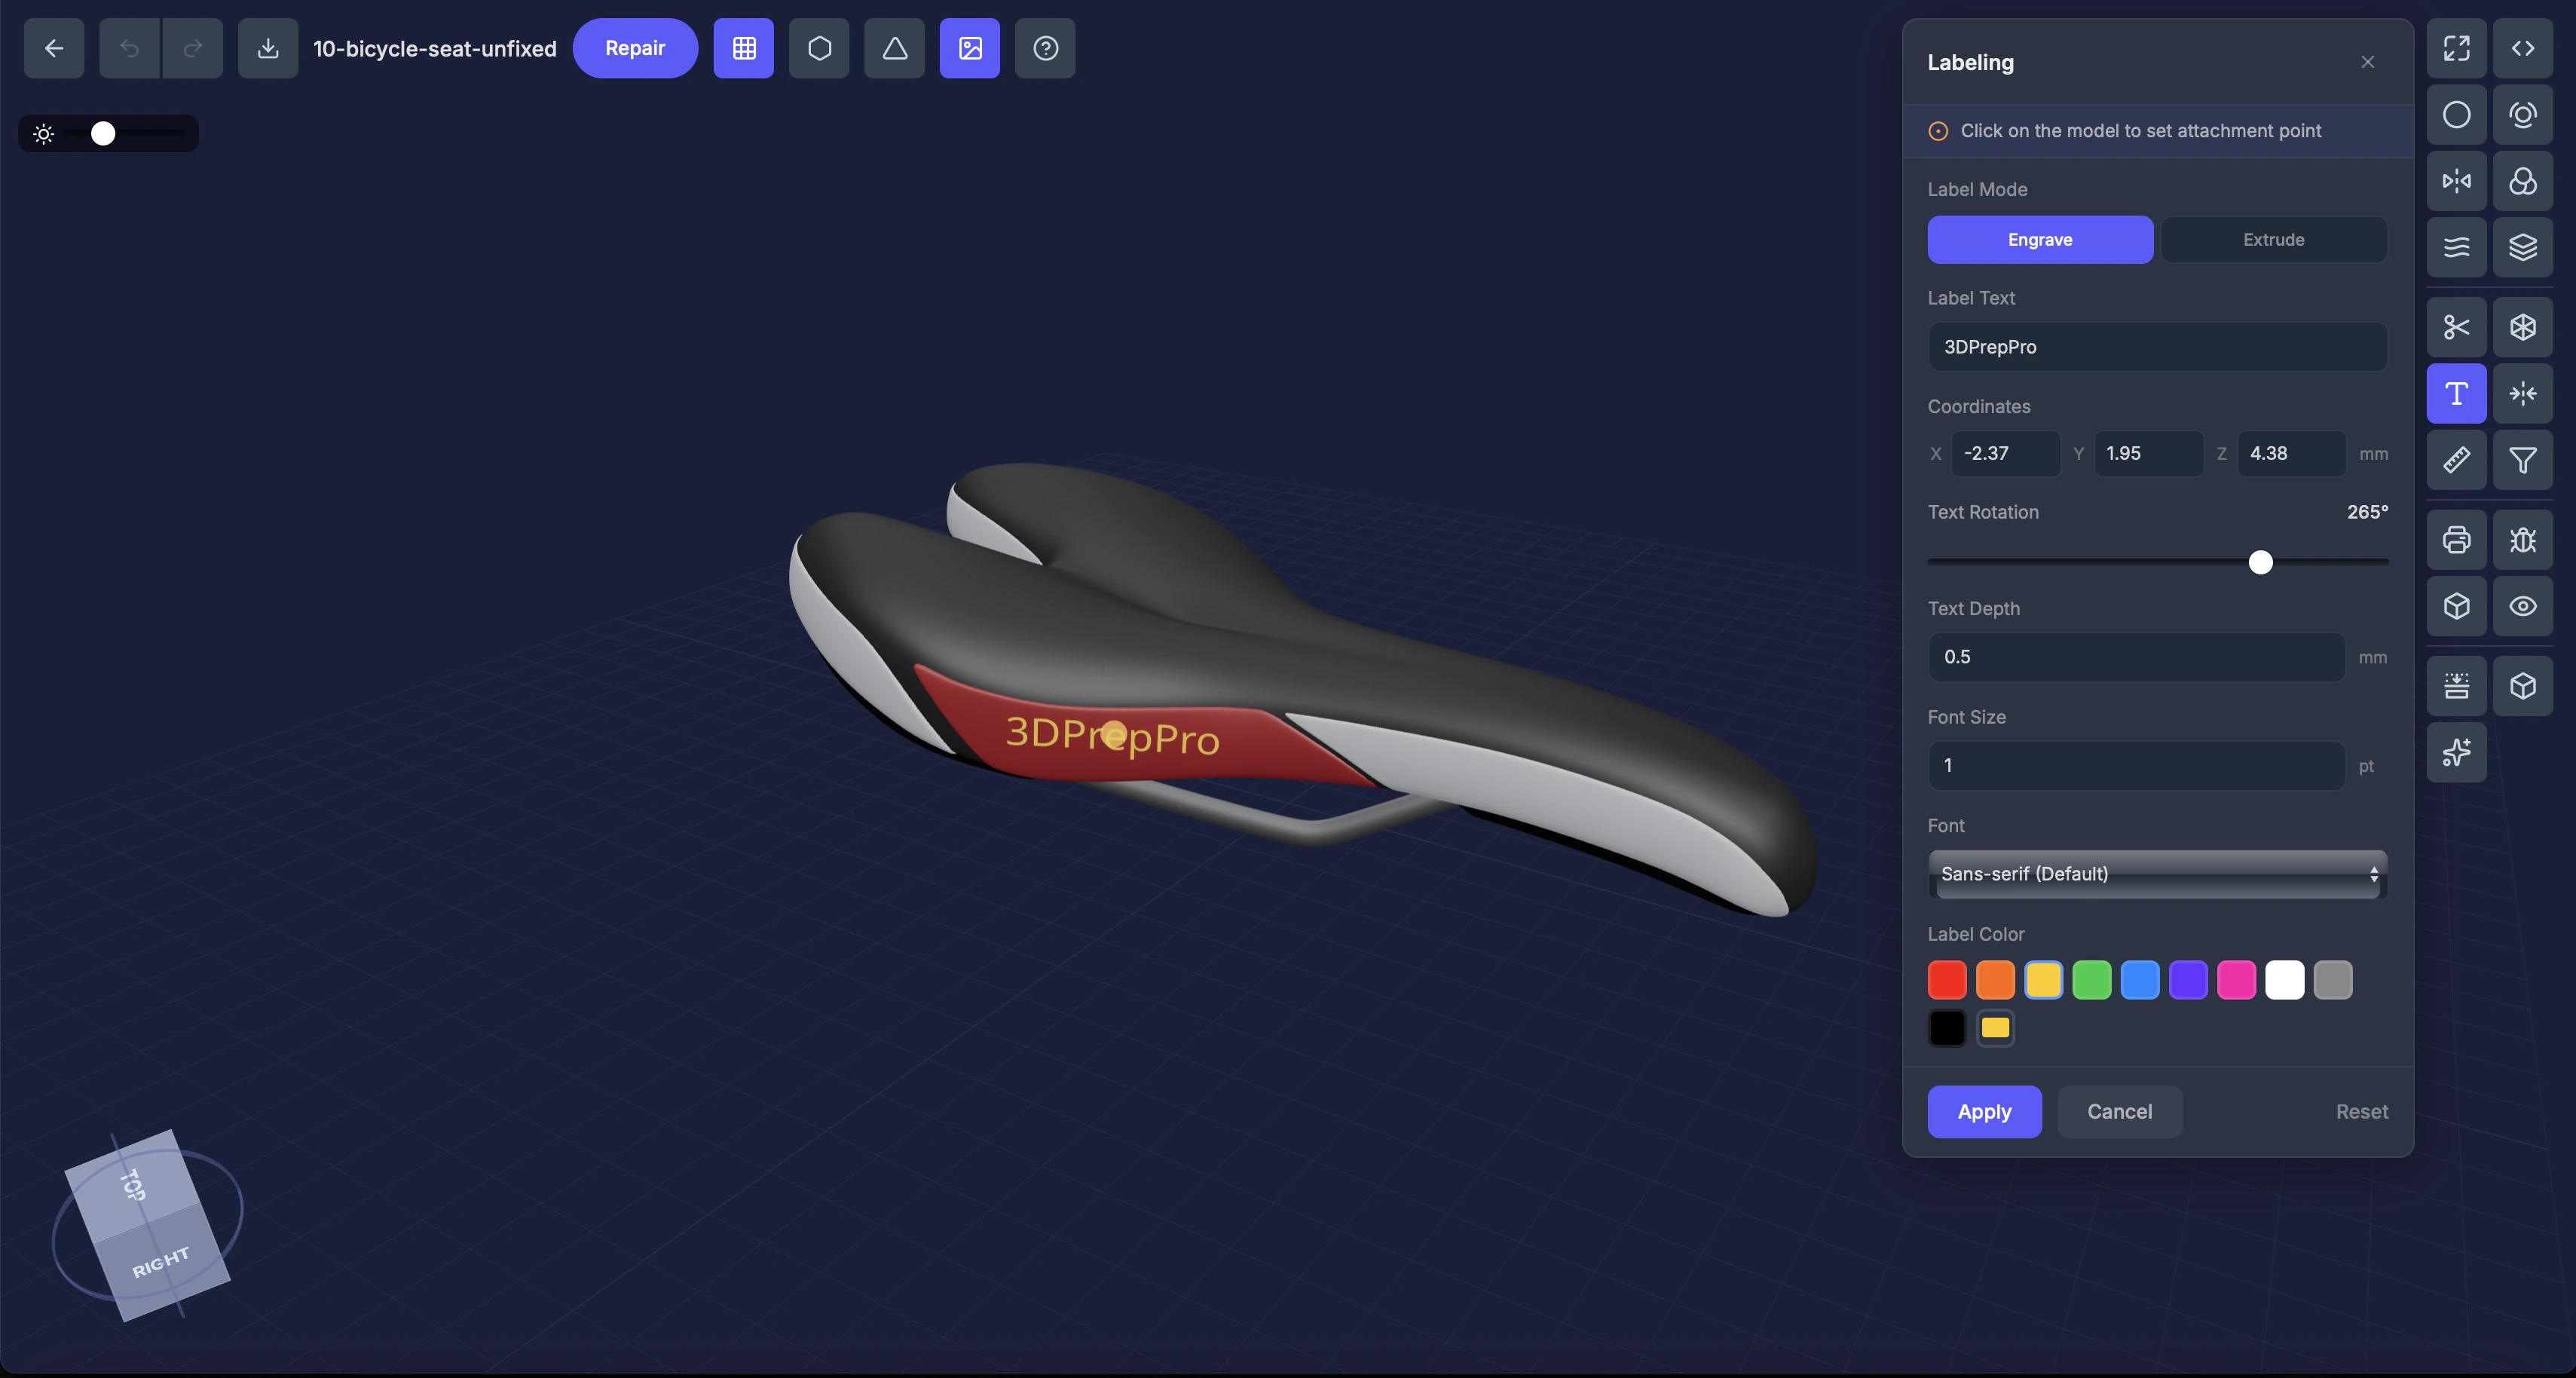
Settings
Mode
- Engrave — Cuts text into the surface (recessed)
- Extrude — Raises text above the surface (protruding)
Text
The text to add to the model.Position (X, Y, Z)
Click on the model to place the label, or enter coordinates manually. A crosshair appears for precise placement.Rotation (0–360°)
Angle of the text on the surface.Depth (mm)
How deep the engraving cuts, or how far the text extrudes.Font size (points)
Size of the text.Font
Default, Serif, or Monospace.Color
Material color for the label geometry.Step by step
Click on the model
Click where you want the label placed. A crosshair cursor helps with positioning.
Tips
- Engrave works better on curved surfaces
- For very small text, increase the depth to ensure it’s visible after printing
- A preview appears before you apply, so you can reposition as needed