Camera controls
Double-click on any part of the model to center the camera on that area.
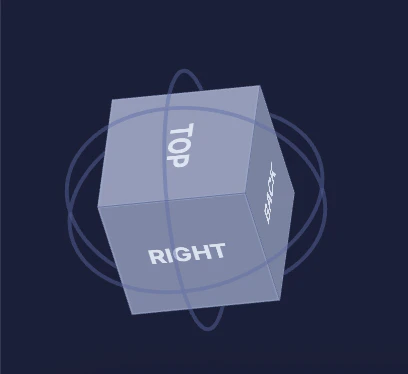
ViewCube
The ViewCube is a small cube in the corner of the viewport. It shows your current viewing angle and lets you quickly snap to standard views:
- Click a face (Front, Back, Left, Right, Top, Bottom) to snap to that standard view
To reach a diagonal or isometric angle, drag the ViewCube’s rotation rings or orbit the camera freely.
Display toggles
The editor header has a row of icon buttons that toggle how the model is drawn. Each one is independent, so they combine freely rather than switching between exclusive modes:
- Grid — Show or hide the ground grid
- Show Edges — Overlay a wireframe on the surface, useful for checking geometry density
- Show Textures — On by default; turn it off to render the model as flat grey for inspecting shape
- Show Edge Analysis — Highlight boundary edges (green) and non-manifold edges (purple)
- Shell view — Cycle through highlighting and exploding the model’s separate meshes (shells)
Side-by-side comparison
After a repair, the editor can show the original and repaired models next to each other. By default both views rotate together, while zoom and pan stay independent per view, making it easy to spot exactly what changed. Use the lock button between the two views to switch between Rotate Together and Rotate Separately.
Interactive picking
Some tools let you click directly on the model:
- Measure tool — Click to place measurement points
- Label tool — Click to set the label position
- Cut tool — Drag the cutting plane gizmo to position it
When a picking tool is active, the cursor changes to a crosshair.