> ## Documentation Index
> Fetch the complete documentation index at: https://docs.3dpreppro.com/llms.txt
> Use this file to discover all available pages before exploring further.
# 关闭孔洞
> 自动填充模型中的缝隙和开口
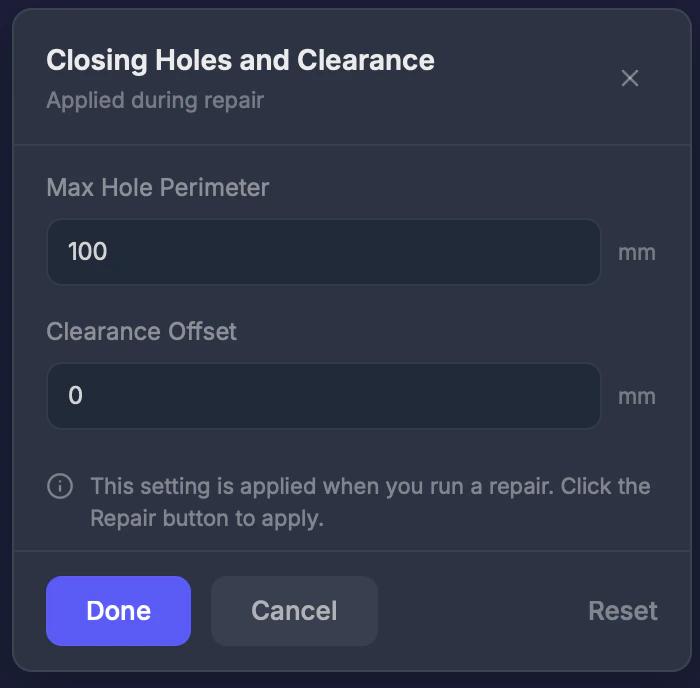 关闭孔洞检测模型表面的开口并将其填充,以创建密封的可打印模型。
## 何时使用此工具
当您的模型有可见的孔洞或缝隙——常见于从雕刻软件或游戏引擎导出的模型,这些模型的表面并非总是密封的。
## 设置
### 最大周长 (0–1000 mm)
仅关闭小于此周长的孔洞。**默认值:100 mm。** 增大此值以关闭更大的开口。
### 间隙偏移 (0–10 mm)
在关闭的孔洞周围添加额外间距。**默认值:0 mm。**
## 操作步骤
在工具栏中点击**关闭孔洞**。
设置孔洞在保持开放之前可以有多大。
孔洞关闭在修复过程中应用。
## 提示
* 小孔洞(周长小于 10 mm)通常是建模产物——放心关闭
* 大孔洞可能是**有意的**(如花瓶底部或窗户开口)。设置较小的最大周长以保留它们。
* 使用[错误](/editor/tools/errors)工具查看修复前有多少孔洞
This documentation is built and hosted on [Mintlify](https://mintlify.com), a developer documentation platform.
关闭孔洞检测模型表面的开口并将其填充,以创建密封的可打印模型。
## 何时使用此工具
当您的模型有可见的孔洞或缝隙——常见于从雕刻软件或游戏引擎导出的模型,这些模型的表面并非总是密封的。
## 设置
### 最大周长 (0–1000 mm)
仅关闭小于此周长的孔洞。**默认值:100 mm。** 增大此值以关闭更大的开口。
### 间隙偏移 (0–10 mm)
在关闭的孔洞周围添加额外间距。**默认值:0 mm。**
## 操作步骤
在工具栏中点击**关闭孔洞**。
设置孔洞在保持开放之前可以有多大。
孔洞关闭在修复过程中应用。
## 提示
* 小孔洞(周长小于 10 mm)通常是建模产物——放心关闭
* 大孔洞可能是**有意的**(如花瓶底部或窗户开口)。设置较小的最大周长以保留它们。
* 使用[错误](/editor/tools/errors)工具查看修复前有多少孔洞
This documentation is built and hosted on [Mintlify](https://mintlify.com), a developer documentation platform.