> ## Documentation Index
> Fetch the complete documentation index at: https://docs.3dpreppro.com/llms.txt
> Use this file to discover all available pages before exploring further.
# AI fix report
> Understand exactly what was fixed and why
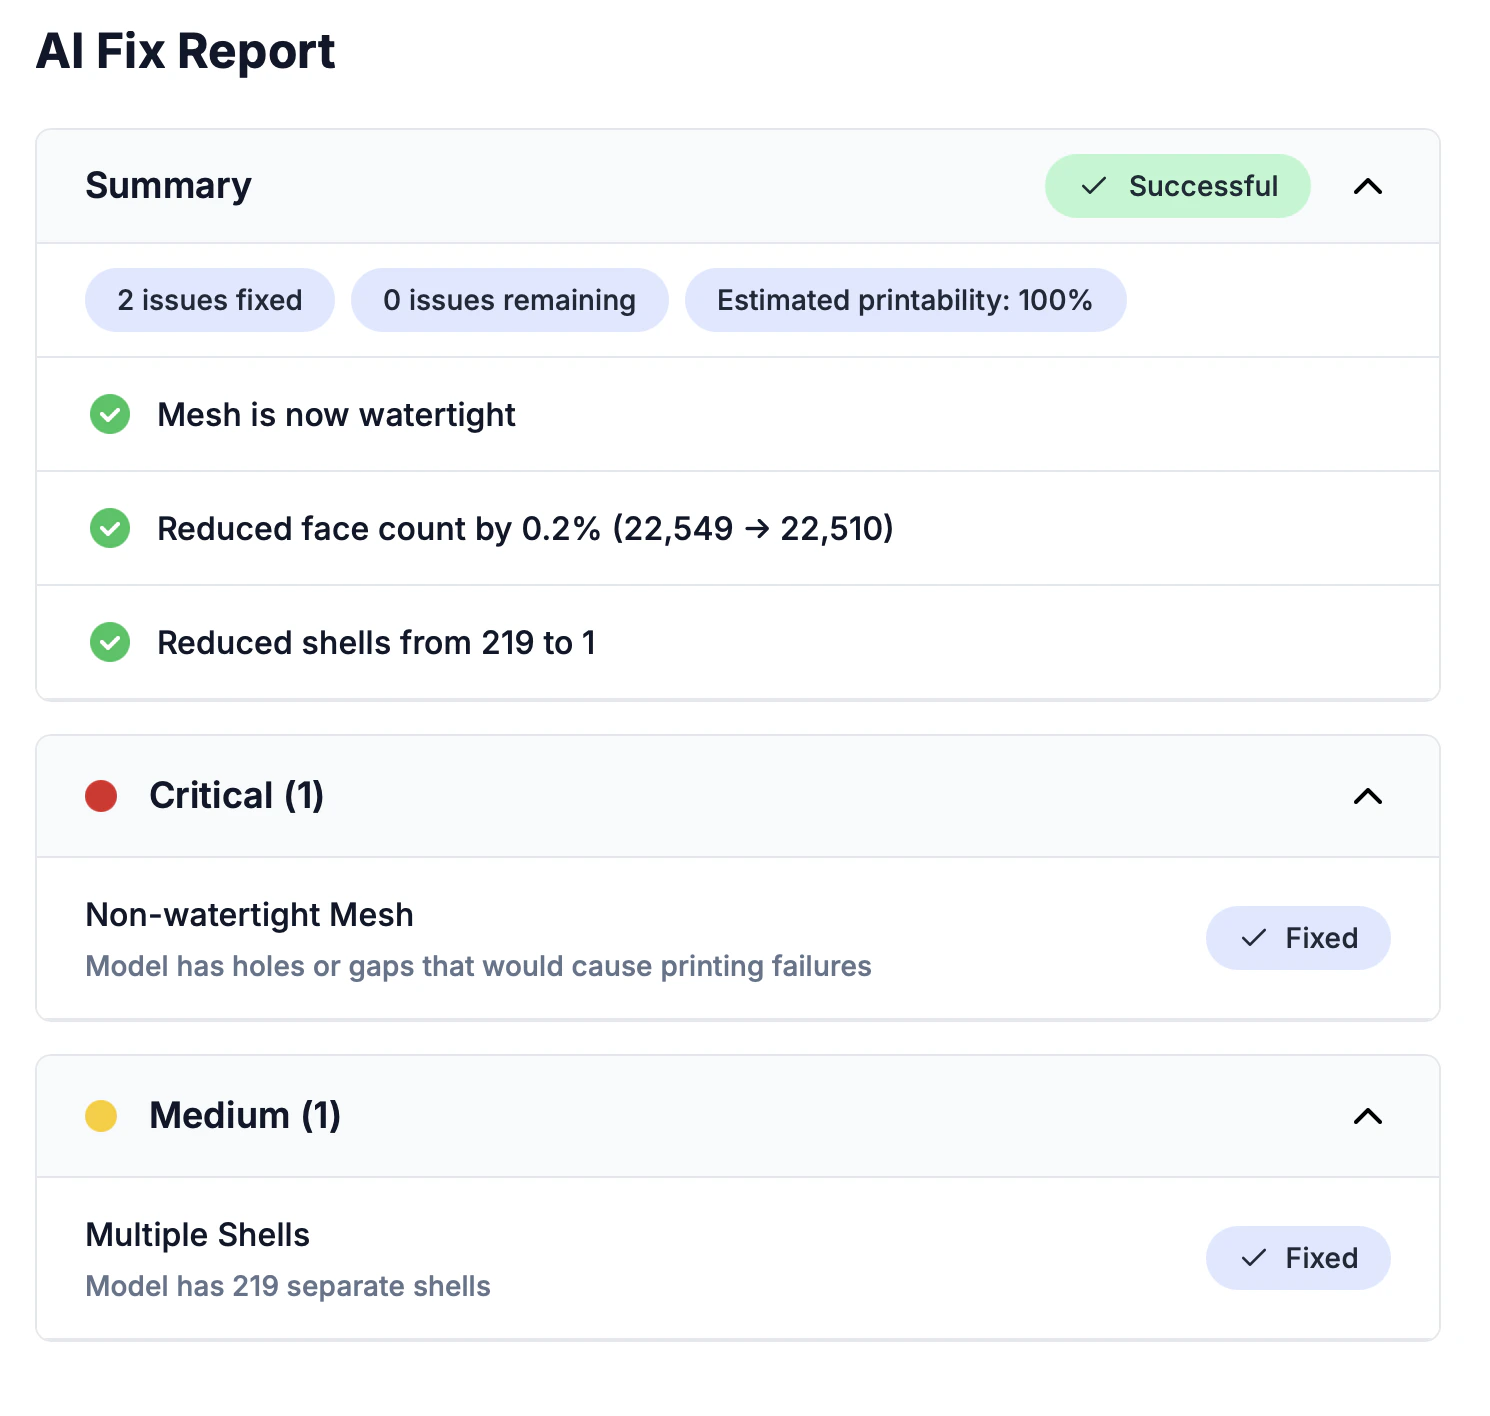
After every repair, our AI generates a detailed report explaining what issues were found and how they were resolved.
 ## Report sections
### Summary
A quick overview: how many issues were found, how many were fixed, and an overall printability assessment.
### Issue categories
Issues are grouped by severity:
| Severity | Color | Examples |
| ------------ | ------ | ----------------------------------------------------- |
| **Critical** | Red | Open holes, zero-thickness walls, non-sealed surfaces |
| **Medium** | Yellow | Thin walls near the minimum, tight clearances |
| **Minor** | Gray | Unnecessary geometry, suboptimal topology |
Each issue shows:
* The name of the issue
* A short description of what was found
* A **Fixed** pill when it was successfully resolved
### Improvements
A summary of all optimizations applied: polygon reduction, surface smoothing, texture cleanup, and more.
### Settings used
The exact settings used for this repair, so you can reproduce the result or adjust and re-repair.
## Before and after comparison
The repair detail page shows a **360° image preview** you can drag to rotate the model. To compare the original and repaired versions, click the **Open in 3D Viewer** button — it opens the editor's side-by-side split view, with the original model on the left and the repaired version on the right.
## Report sections
### Summary
A quick overview: how many issues were found, how many were fixed, and an overall printability assessment.
### Issue categories
Issues are grouped by severity:
| Severity | Color | Examples |
| ------------ | ------ | ----------------------------------------------------- |
| **Critical** | Red | Open holes, zero-thickness walls, non-sealed surfaces |
| **Medium** | Yellow | Thin walls near the minimum, tight clearances |
| **Minor** | Gray | Unnecessary geometry, suboptimal topology |
Each issue shows:
* The name of the issue
* A short description of what was found
* A **Fixed** pill when it was successfully resolved
### Improvements
A summary of all optimizations applied: polygon reduction, surface smoothing, texture cleanup, and more.
### Settings used
The exact settings used for this repair, so you can reproduce the result or adjust and re-repair.
## Before and after comparison
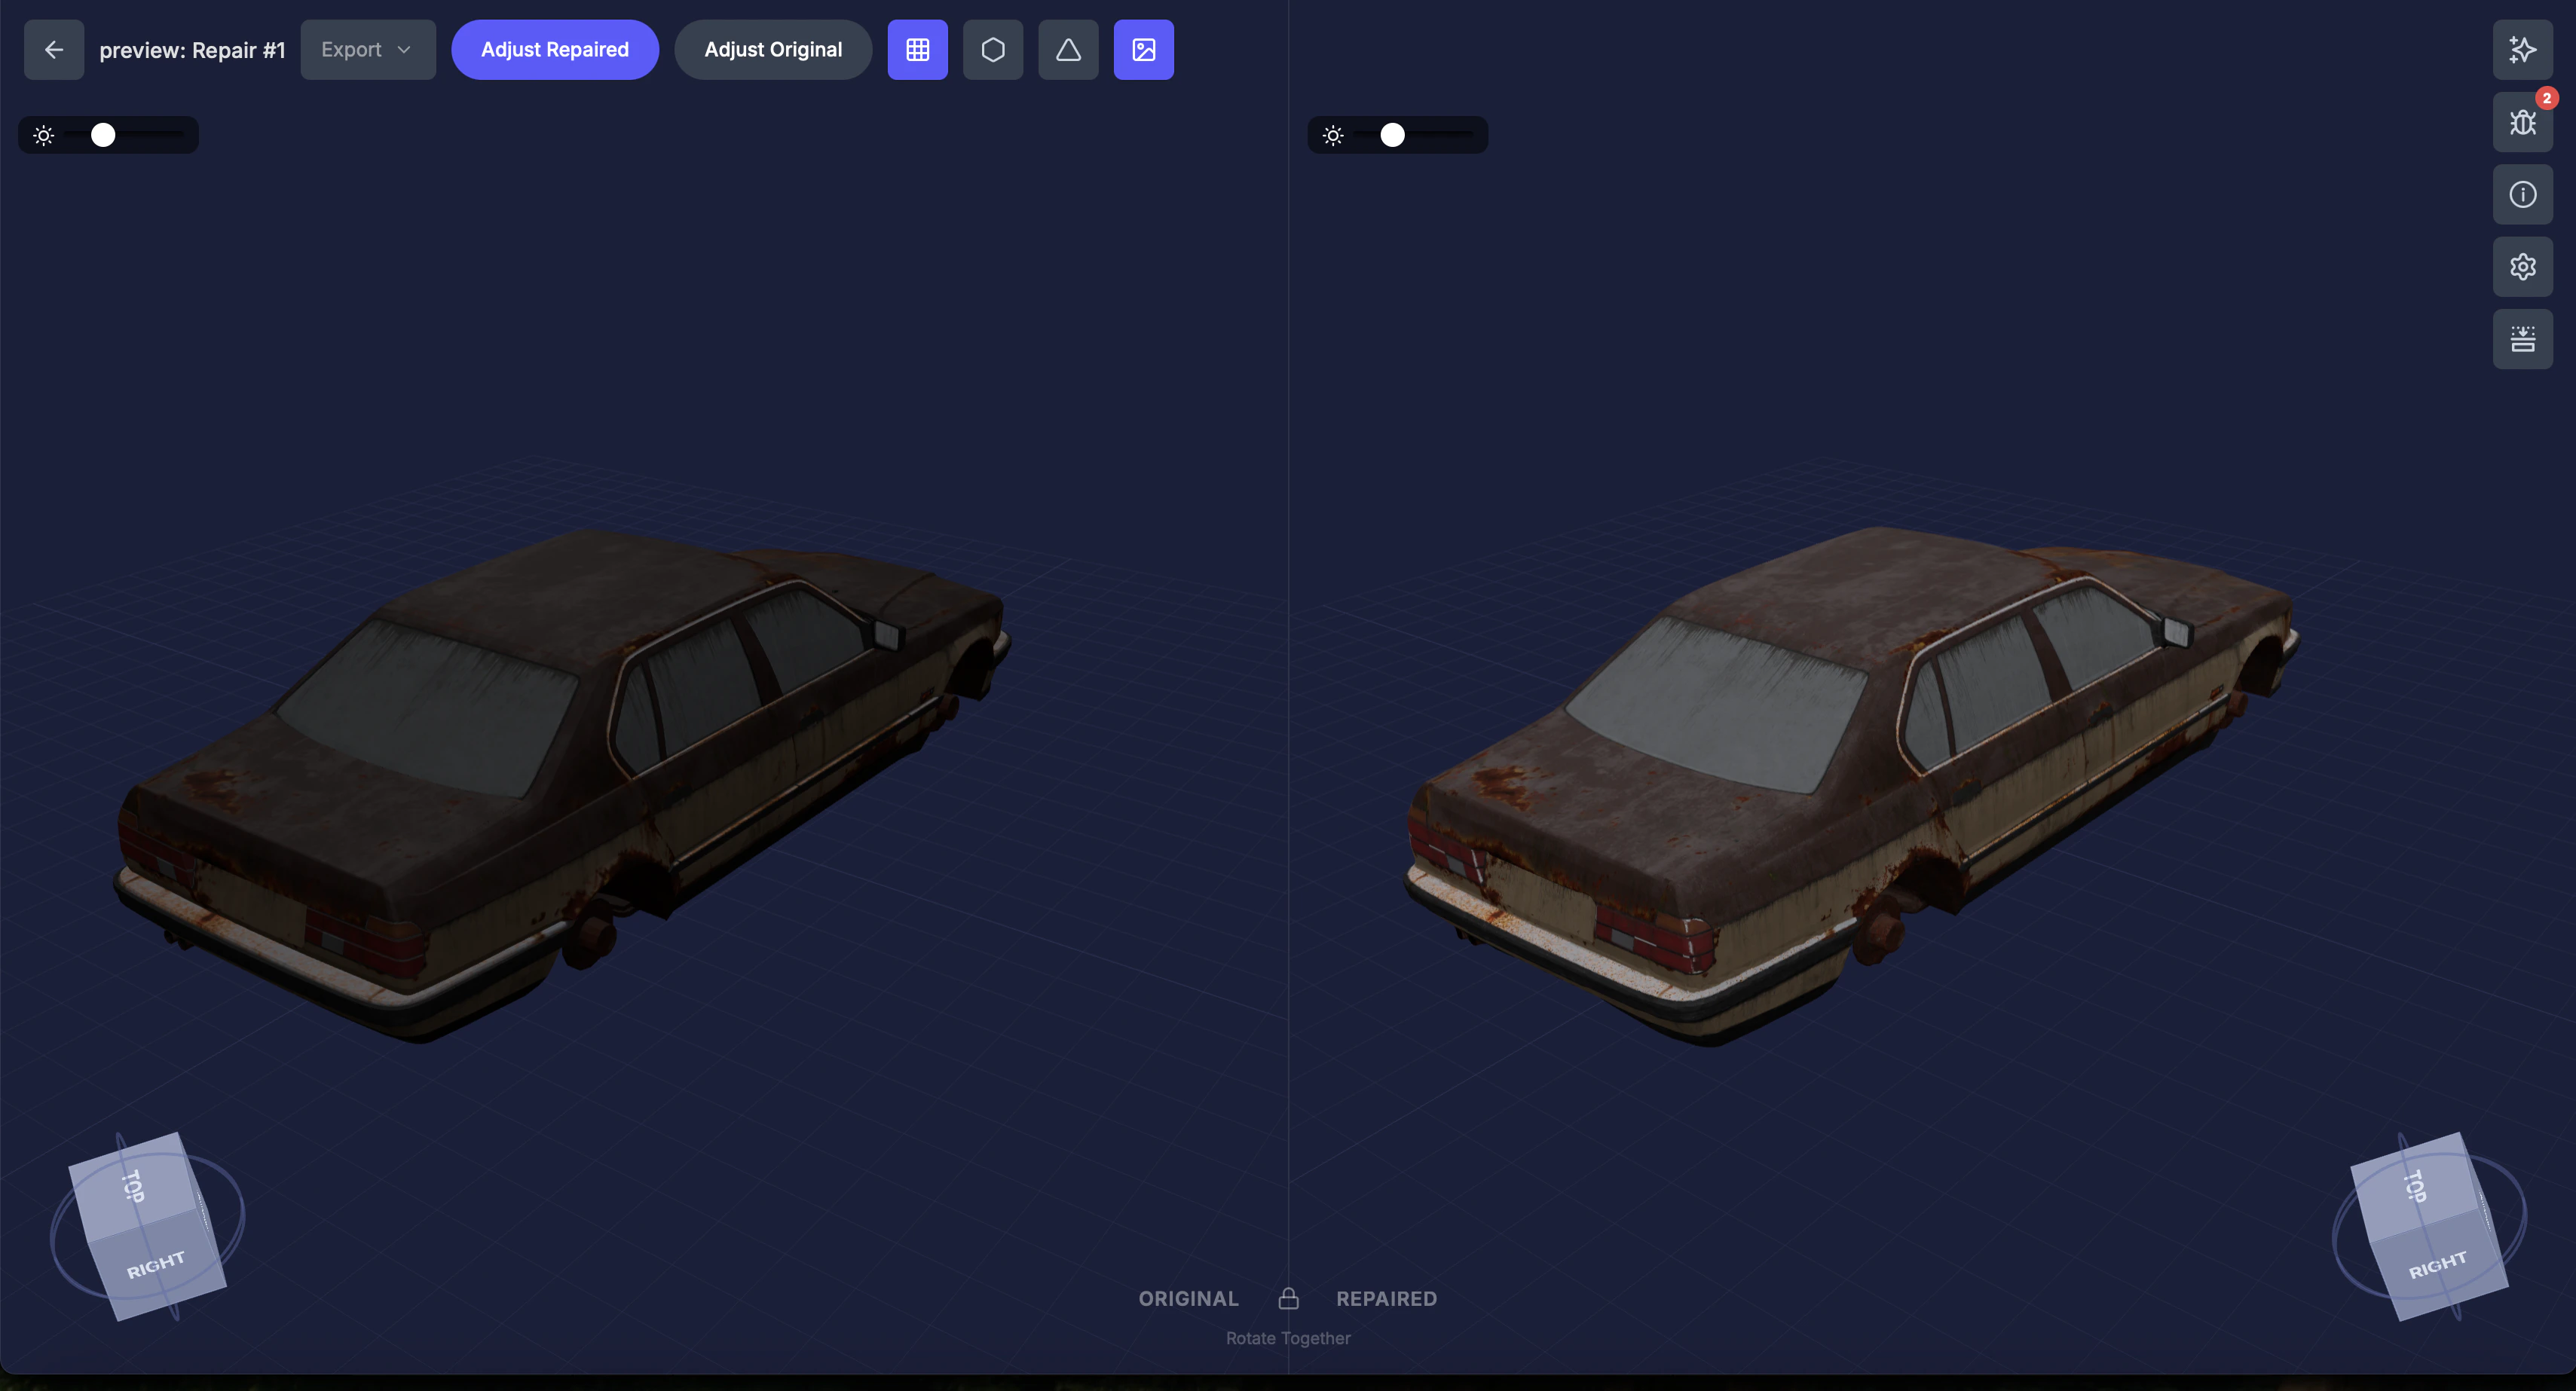
The repair detail page shows a **360° image preview** you can drag to rotate the model. To compare the original and repaired versions, click the **Open in 3D Viewer** button — it opens the editor's side-by-side split view, with the original model on the left and the repaired version on the right.
 If the report shows unfixed issues, try re-repairing with different settings. For example, increasing wall thickness often resolves remaining thin-wall warnings.
The AI report is generated automatically and focuses on print-readiness. It's designed to help you understand the repairs without needing 3D printing expertise.
If the report shows unfixed issues, try re-repairing with different settings. For example, increasing wall thickness often resolves remaining thin-wall warnings.
The AI report is generated automatically and focuses on print-readiness. It's designed to help you understand the repairs without needing 3D printing expertise.