> ## Documentation Index
> Fetch the complete documentation index at: https://docs.3dpreppro.com/llms.txt
> Use this file to discover all available pages before exploring further.
# Uploading files
> How to get your 3D files into the platform
## Drag and drop
The fastest way to upload is dragging your files directly onto the upload area on the [home dashboard](/models/home-dashboard) or the [My Models](/models/model-library) page. You can also click **Browse** to open a file picker.
## Upload progress
Each file shows a progress bar during upload. You can cancel individual uploads by clicking the X button on the progress card. When uploading multiple files, they process in parallel.
## Archives
Upload **ZIP** or **RAR** archives and we automatically extract them. We find and process the 3D files inside, including any associated texture and material files.
For OBJ files, the best approach is to ZIP the `.obj` file together with the `.mtl` file and all texture images (`.png`, `.jpg`). This ensures colors and textures are preserved.
## Special file types
### Medical imaging (DICOM)
When you upload DICOM files (`.dcm`), a configuration dialog appears after upload.
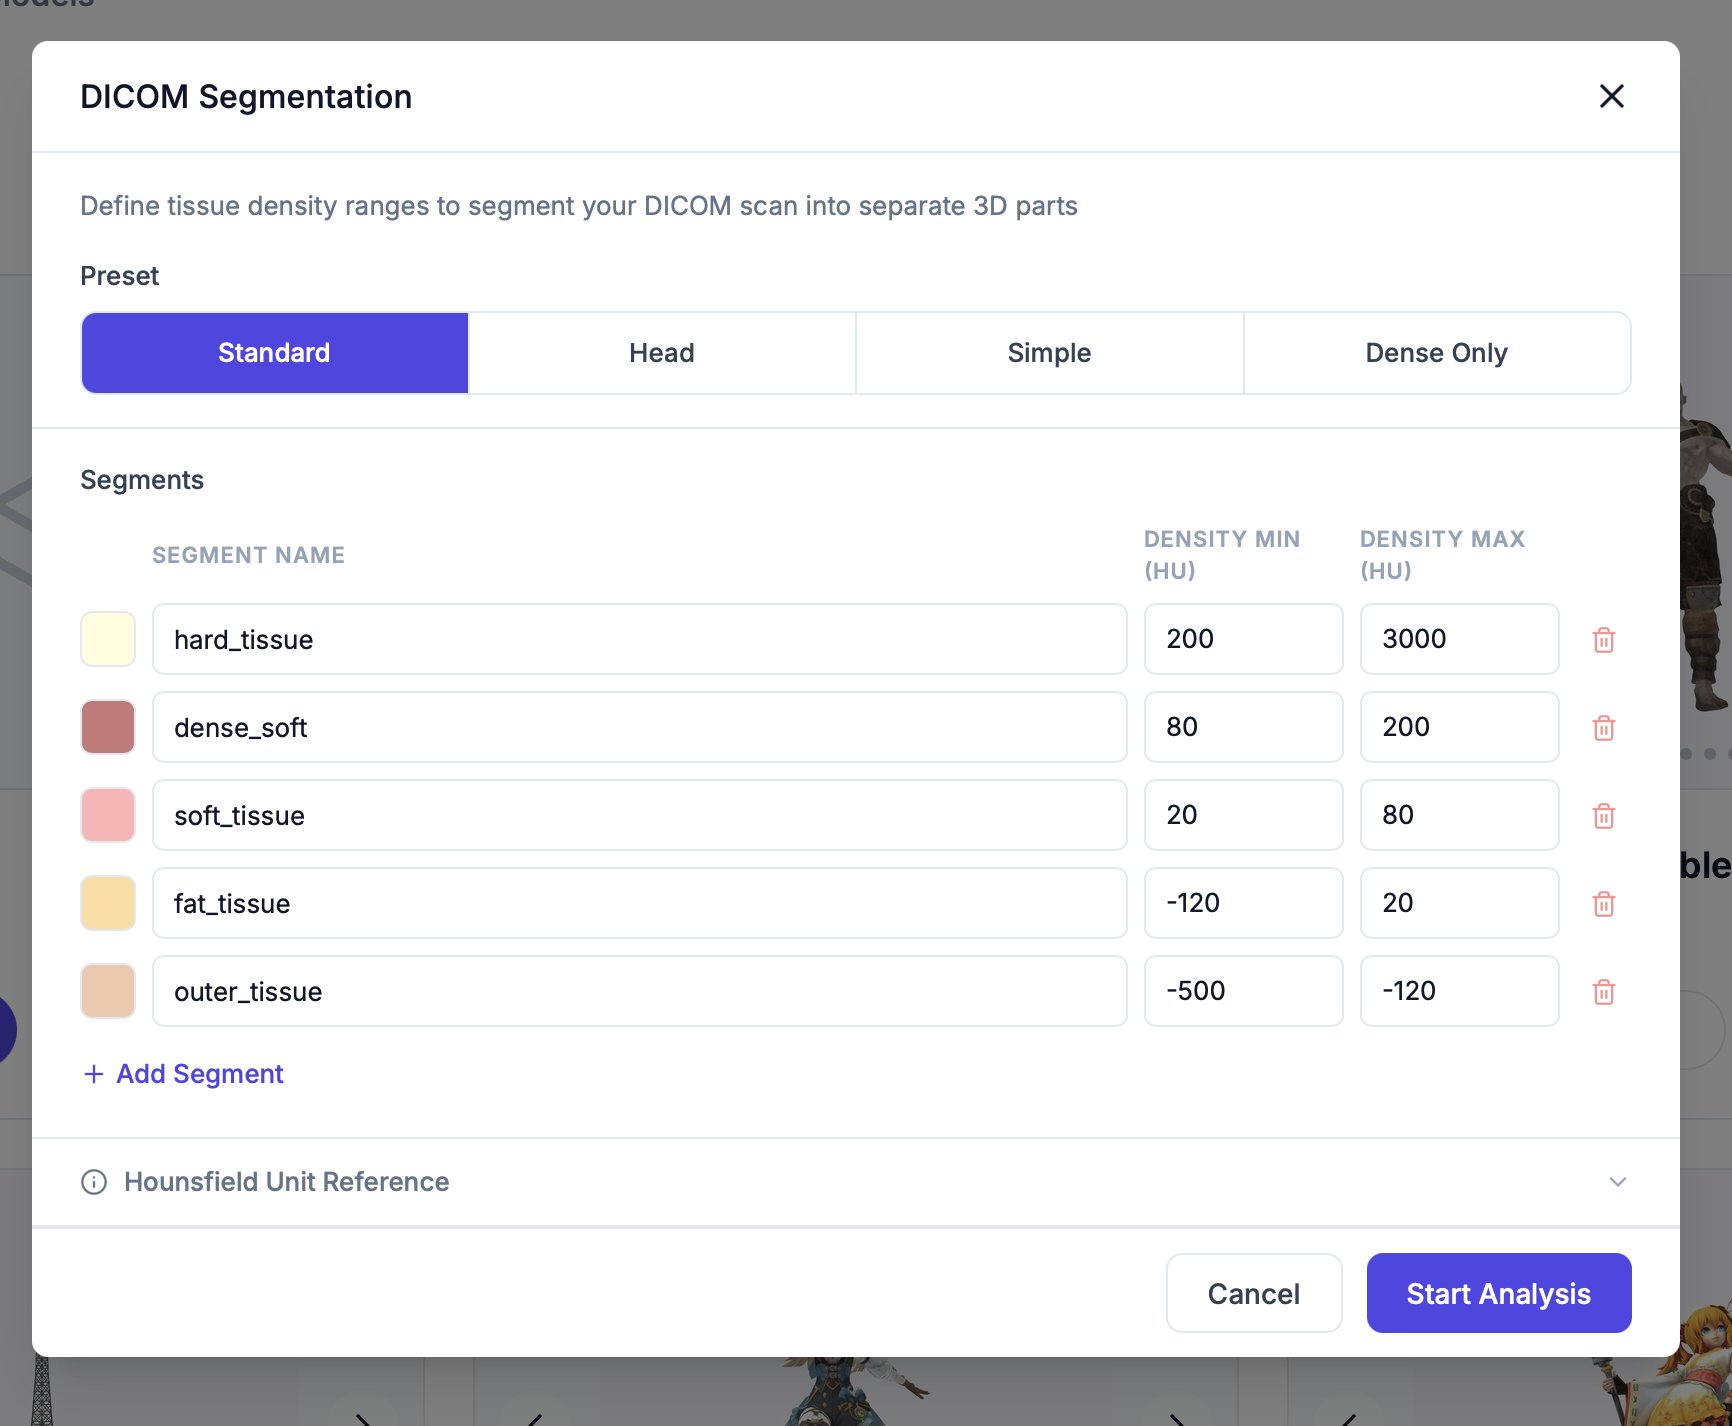 You can configure:
* **Segmentation preset** — Choose from Standard, Head, Simple, or Dense Only
* **Segment definitions** — Add or remove body segments with custom names, colors, and per-segment density ranges (Hounsfield Unit min/max)
Click **Start Analysis** to begin converting the DICOM data into a 3D mesh.
Maximum file size is **8 million polygons** per upload. For larger models, reduce the polygon count in your modeling software before uploading.
You can configure:
* **Segmentation preset** — Choose from Standard, Head, Simple, or Dense Only
* **Segment definitions** — Add or remove body segments with custom names, colors, and per-segment density ranges (Hounsfield Unit min/max)
Click **Start Analysis** to begin converting the DICOM data into a 3D mesh.
Maximum file size is **8 million polygons** per upload. For larger models, reduce the polygon count in your modeling software before uploading.