> ## Documentation Index
> Fetch the complete documentation index at: https://docs.3dpreppro.com/llms.txt
> Use this file to discover all available pages before exploring further.
# Model library
> Browse and manage all your uploaded models
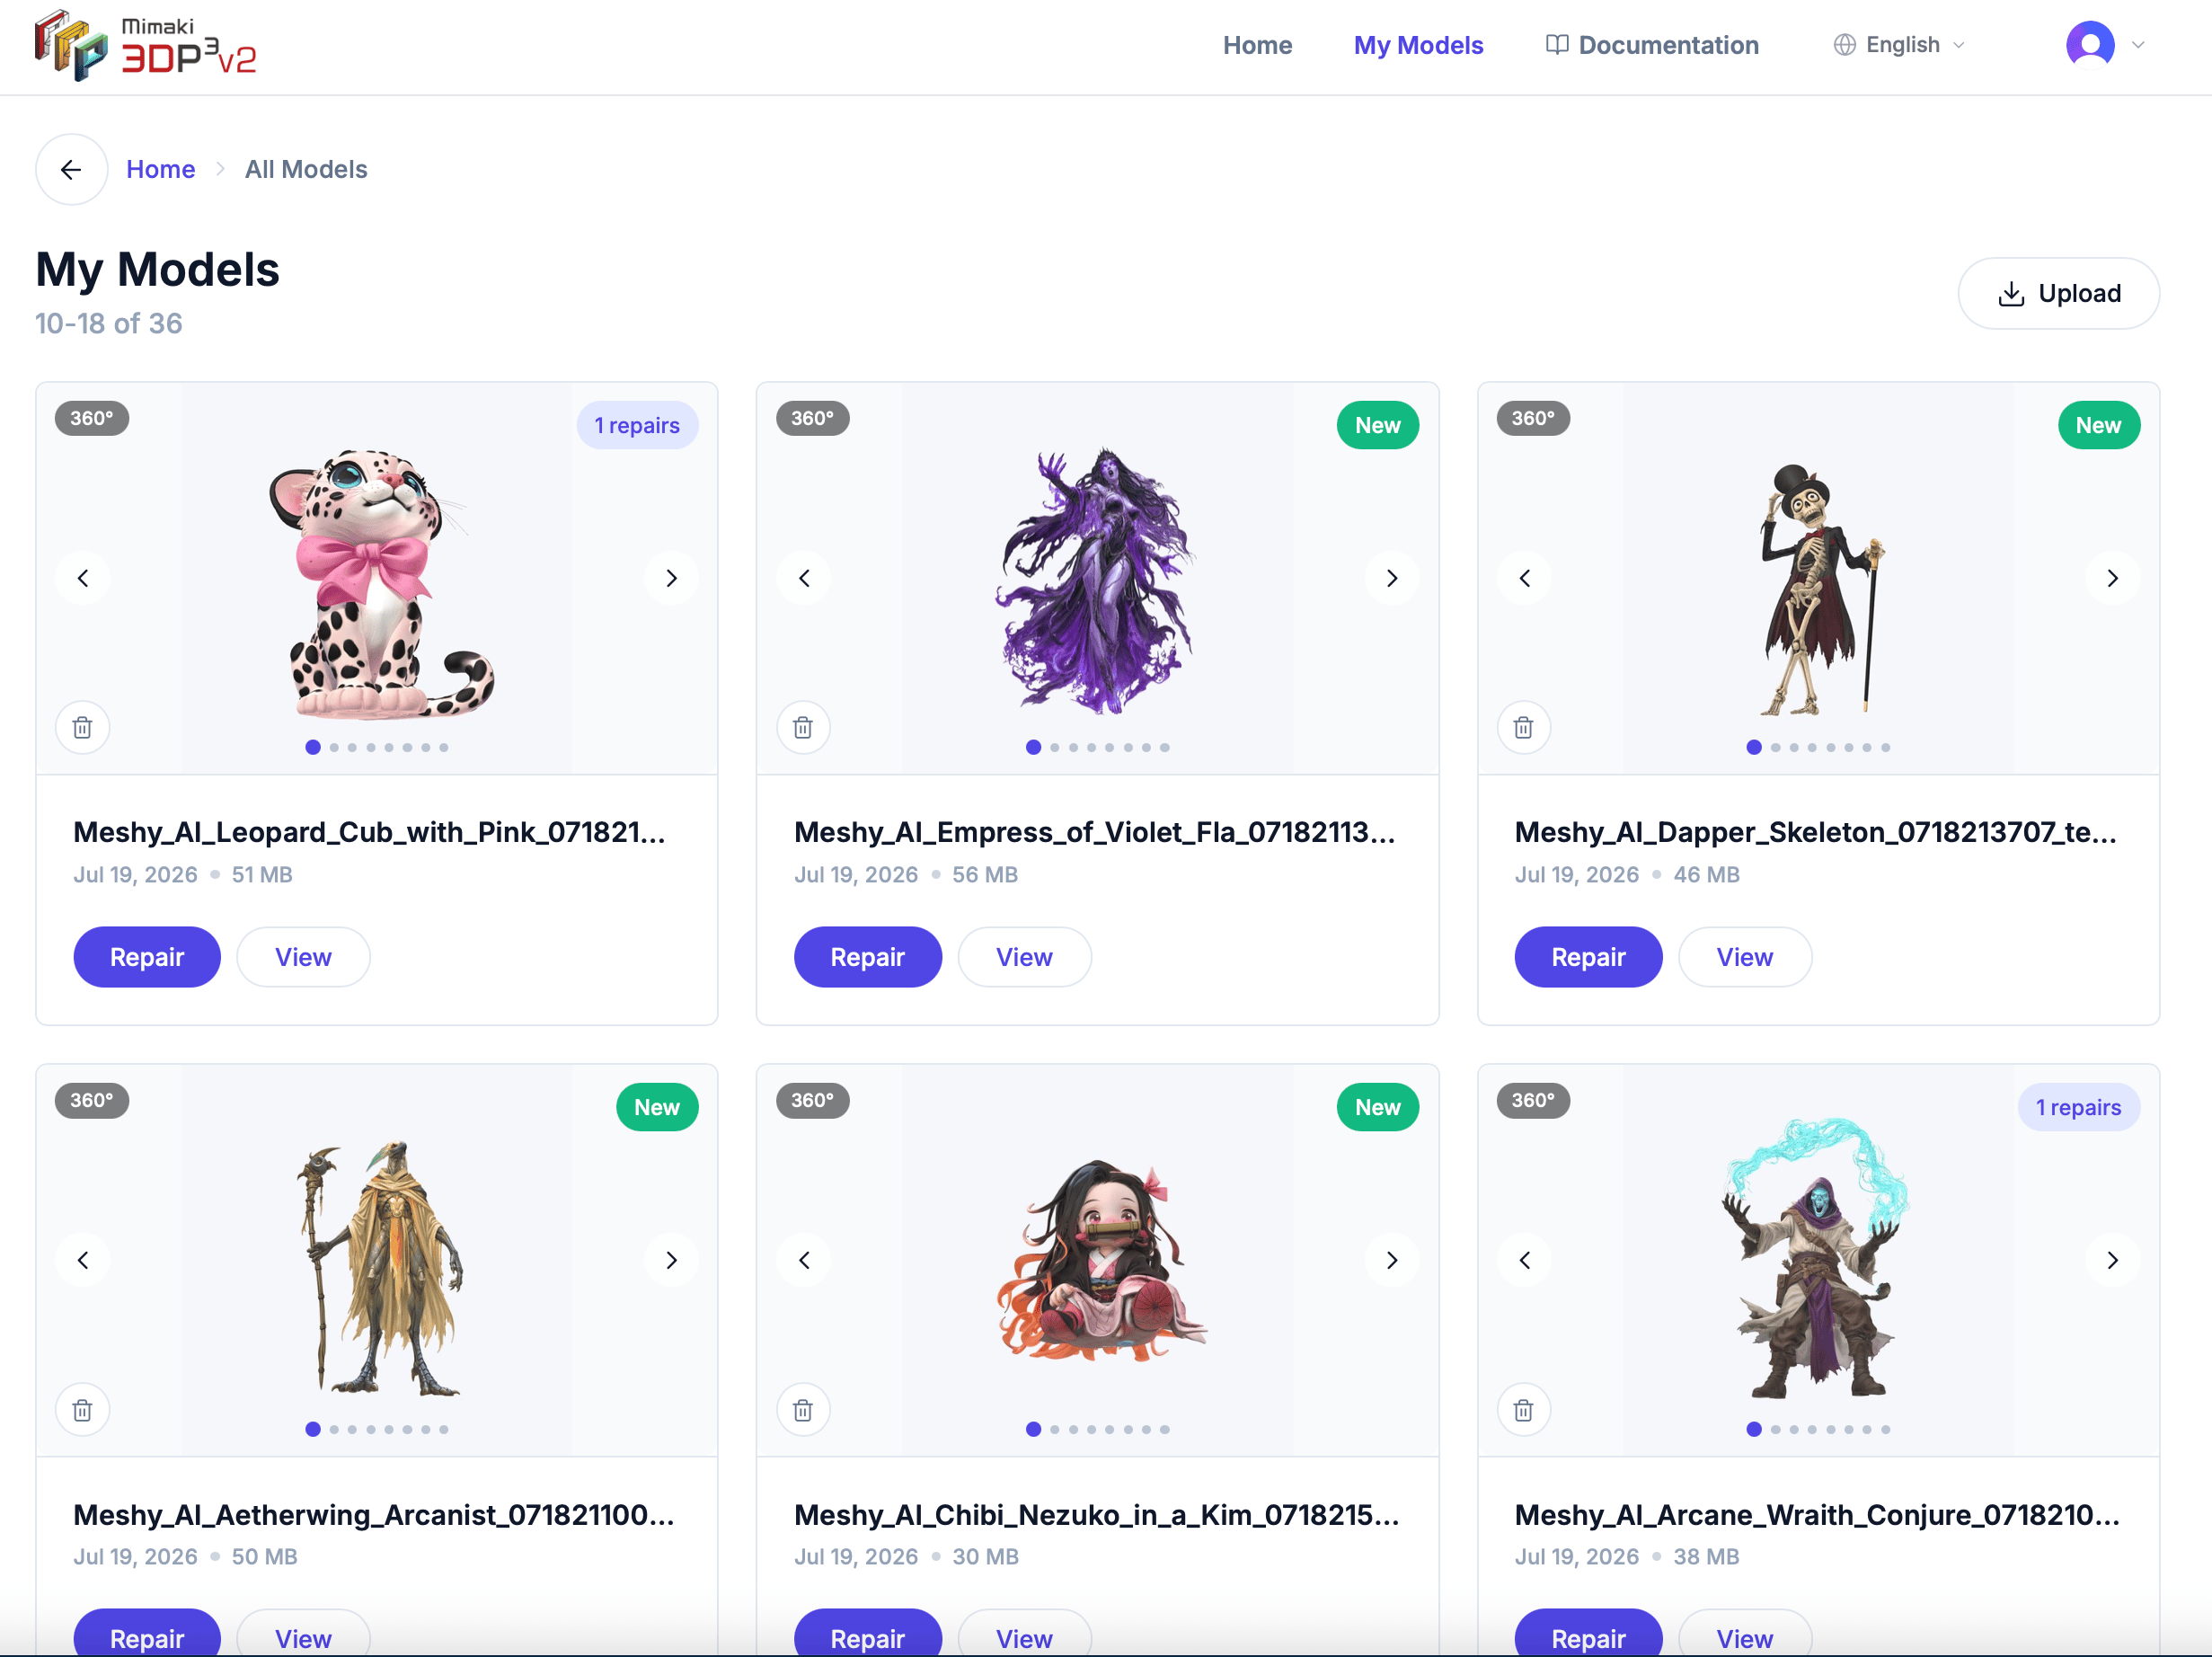 The **My Models** page shows all your uploaded models in a grid layout. Access it from the navigation bar at the top of any page.
## Model cards
Each model card shows:
* **360° thumbnail** — Hover or click arrows to see the model from different angles
* **Model name** — The original filename
* **Upload date** — When you uploaded the file
* **File size** — Size of the original file
* **Repair count** — How many times this model has been repaired
* **"New" badge** — Appears on recently uploaded models
## Actions
Each model card has two buttons:
* **Repair** — Opens the model's [detail page](/models/model-detail), where you can view the model in 3D, start a new repair, download the original file, or delete the model and all its repairs.
* **View** — Opens the model directly in the [3D editor](/editor/overview).
The card itself isn't clickable — clicking or dragging the preview only rotates the 360° view.
## Pagination
Models are displayed 9 per page. Use the numbered buttons and arrows at the bottom to navigate between pages.
## Uploading from My Models
Click the **Upload Model** button in the top-right header to open the upload dialog. This works the same as the upload area on the home dashboard.
The **My Models** page shows all your uploaded models in a grid layout. Access it from the navigation bar at the top of any page.
## Model cards
Each model card shows:
* **360° thumbnail** — Hover or click arrows to see the model from different angles
* **Model name** — The original filename
* **Upload date** — When you uploaded the file
* **File size** — Size of the original file
* **Repair count** — How many times this model has been repaired
* **"New" badge** — Appears on recently uploaded models
## Actions
Each model card has two buttons:
* **Repair** — Opens the model's [detail page](/models/model-detail), where you can view the model in 3D, start a new repair, download the original file, or delete the model and all its repairs.
* **View** — Opens the model directly in the [3D editor](/editor/overview).
The card itself isn't clickable — clicking or dragging the preview only rotates the 360° view.
## Pagination
Models are displayed 9 per page. Use the numbered buttons and arrows at the bottom to navigate between pages.
## Uploading from My Models
Click the **Upload Model** button in the top-right header to open the upload dialog. This works the same as the upload area on the home dashboard.