> ## Documentation Index
> Fetch the complete documentation index at: https://docs.3dpreppro.com/llms.txt
> Use this file to discover all available pages before exploring further.
# DICOM medical scans
> Turn CT and MRI scans into printable 3D models with tissue segmentation
 **DICOM** is the standard format for medical imaging — CT and MRI scans exported from hospital equipment. 3D Prep Pro accepts `.dcm` and `.dicom` files and turns them into printable 3D models by separating the scan into tissue types.
Unlike a normal mesh, a DICOM scan is a stack of density measurements, not a surface. Before it can be repaired you tell 3D Prep Pro **which densities to turn into solid parts** — this is called segmentation.
## Segmenting your scan
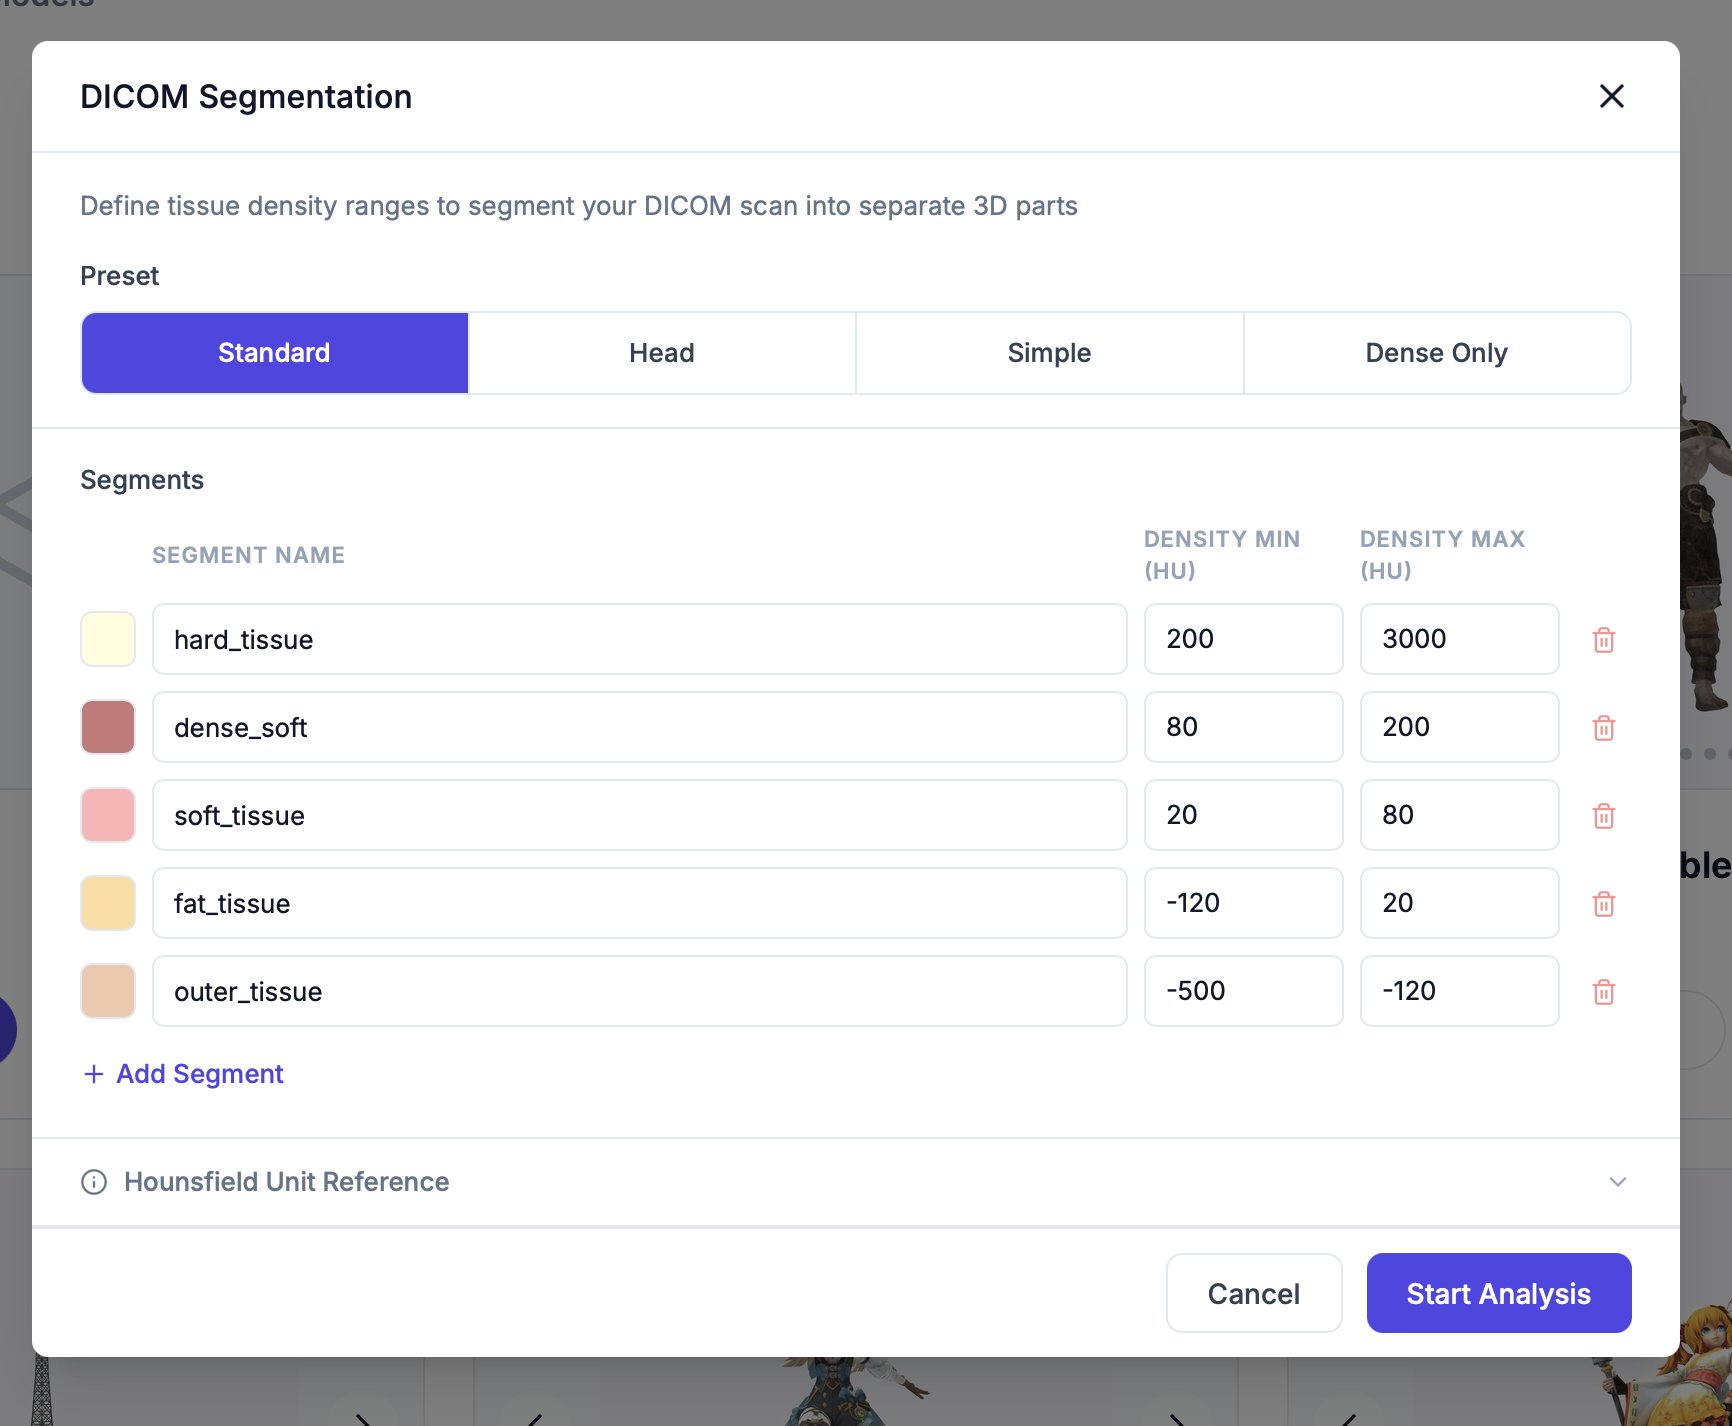
When you upload a DICOM file, the **DICOM Segmentation** dialog opens automatically. This step is **required** — a scan with no segmentation can't be repaired.
Density is measured in **Hounsfield Units (HU)**. Each segment you define becomes a separate watertight part built from everything inside its HU range.
You must complete segmentation before analysis runs. If you try to repair an unsegmented DICOM model, you'll be prompted to re-analyze it with a segmentation preset first.
### Presets
Start from a preset, then adjust the ranges if you need to.
| Preset | Segments it creates |
| -------------- | ------------------------------------------------------------------------------------------------------------------- |
| **Standard** | Hard tissue (200–3000), dense soft tissue (80–200), soft tissue (20–80), fat (−120–20), outer tissue (−500 to −120) |
| **Head** | Skull (200–3000), brain (20–45), skin (−200–20) |
| **Simple** | Hard tissue (200–3000), medium tissue (15–200), outer tissue (−200–15) |
| **Dense Only** | High density (700–3000), low density (200–700) |
### Defining segments
Choose the preset closest to what you want to print (bone, whole head, etc.).
For each segment, set the **Density Min** and **Density Max** (HU). Min must be less than Max, and every segment needs a name.
Use **Add Segment** to isolate another tissue type, or remove segments you don't need.
Click **Start Analysis**. Each segment is reconstructed into its own 3D part.
### Hounsfield Unit reference
Common tissue densities to help you set ranges:
| Tissue | Range |
| -------------------- | --------------- |
| Cortical bone | 700 to 3000 HU |
| Cancellous bone | 200 to 700 HU |
| Muscle | 10 to 40 HU |
| Brain (gray / white) | 20 to 45 HU |
| Blood | 30 to 45 HU |
| Soft tissue | 20 to 80 HU |
| Fat | −120 to −50 HU |
| Lung | −700 to −500 HU |
| Air | −1000 HU |
| Metal implants | above 3000 HU |
## Repairing a DICOM model
DICOM repair works on the segments you created:
* On the repair dialog you choose **which segments to repair** — each selected segment runs through the full repair pipeline independently, so repair time grows with the number of segments.
* DICOM models are repaired at an **optimized resolution** tuned for scan data, rather than the maximum-detail setting used for regular meshes — the scan's own slice resolution is the limiting factor anyway.
* Surface smoothing is applied automatically so the result isn't stair-stepped: if you leave [Post-construct smoothing](/repair/advanced-settings#smoothing) at 0, the engine raises it for DICOM models.
Select only the segments you plan to print. Repairing five segments takes roughly five times as long as repairing one.
## Tips
* Bone (hard tissue) is the easiest to print — it has the clearest density boundary.
* If a part comes out with holes or gaps, widen its HU range slightly; if it merges tissues you wanted separate, narrow it.
* Use [Slice View](/editor/tools/slice-view) after repair to check the internal structure of each segment.
**DICOM** is the standard format for medical imaging — CT and MRI scans exported from hospital equipment. 3D Prep Pro accepts `.dcm` and `.dicom` files and turns them into printable 3D models by separating the scan into tissue types.
Unlike a normal mesh, a DICOM scan is a stack of density measurements, not a surface. Before it can be repaired you tell 3D Prep Pro **which densities to turn into solid parts** — this is called segmentation.
## Segmenting your scan
When you upload a DICOM file, the **DICOM Segmentation** dialog opens automatically. This step is **required** — a scan with no segmentation can't be repaired.
Density is measured in **Hounsfield Units (HU)**. Each segment you define becomes a separate watertight part built from everything inside its HU range.
You must complete segmentation before analysis runs. If you try to repair an unsegmented DICOM model, you'll be prompted to re-analyze it with a segmentation preset first.
### Presets
Start from a preset, then adjust the ranges if you need to.
| Preset | Segments it creates |
| -------------- | ------------------------------------------------------------------------------------------------------------------- |
| **Standard** | Hard tissue (200–3000), dense soft tissue (80–200), soft tissue (20–80), fat (−120–20), outer tissue (−500 to −120) |
| **Head** | Skull (200–3000), brain (20–45), skin (−200–20) |
| **Simple** | Hard tissue (200–3000), medium tissue (15–200), outer tissue (−200–15) |
| **Dense Only** | High density (700–3000), low density (200–700) |
### Defining segments
Choose the preset closest to what you want to print (bone, whole head, etc.).
For each segment, set the **Density Min** and **Density Max** (HU). Min must be less than Max, and every segment needs a name.
Use **Add Segment** to isolate another tissue type, or remove segments you don't need.
Click **Start Analysis**. Each segment is reconstructed into its own 3D part.
### Hounsfield Unit reference
Common tissue densities to help you set ranges:
| Tissue | Range |
| -------------------- | --------------- |
| Cortical bone | 700 to 3000 HU |
| Cancellous bone | 200 to 700 HU |
| Muscle | 10 to 40 HU |
| Brain (gray / white) | 20 to 45 HU |
| Blood | 30 to 45 HU |
| Soft tissue | 20 to 80 HU |
| Fat | −120 to −50 HU |
| Lung | −700 to −500 HU |
| Air | −1000 HU |
| Metal implants | above 3000 HU |
## Repairing a DICOM model
DICOM repair works on the segments you created:
* On the repair dialog you choose **which segments to repair** — each selected segment runs through the full repair pipeline independently, so repair time grows with the number of segments.
* DICOM models are repaired at an **optimized resolution** tuned for scan data, rather than the maximum-detail setting used for regular meshes — the scan's own slice resolution is the limiting factor anyway.
* Surface smoothing is applied automatically so the result isn't stair-stepped: if you leave [Post-construct smoothing](/repair/advanced-settings#smoothing) at 0, the engine raises it for DICOM models.
Select only the segments you plan to print. Repairing five segments takes roughly five times as long as repairing one.
## Tips
* Bone (hard tissue) is the easiest to print — it has the clearest density boundary.
* If a part comes out with holes or gaps, widen its HU range slightly; if it merges tissues you wanted separate, narrow it.
* Use [Slice View](/editor/tools/slice-view) after repair to check the internal structure of each segment.