> ## Documentation Index
> Fetch the complete documentation index at: https://docs.3dpreppro.com/llms.txt
> Use this file to discover all available pages before exploring further.
# Repair your first model
> Fix common 3D printing issues automatically
The repair process automatically fixes common printing issues — holes, thin walls, non-printable geometry — and optimizes your model for your printer.
From your model card on the home page, or from the model detail page, click the **Repair** button. The repair dialog opens.
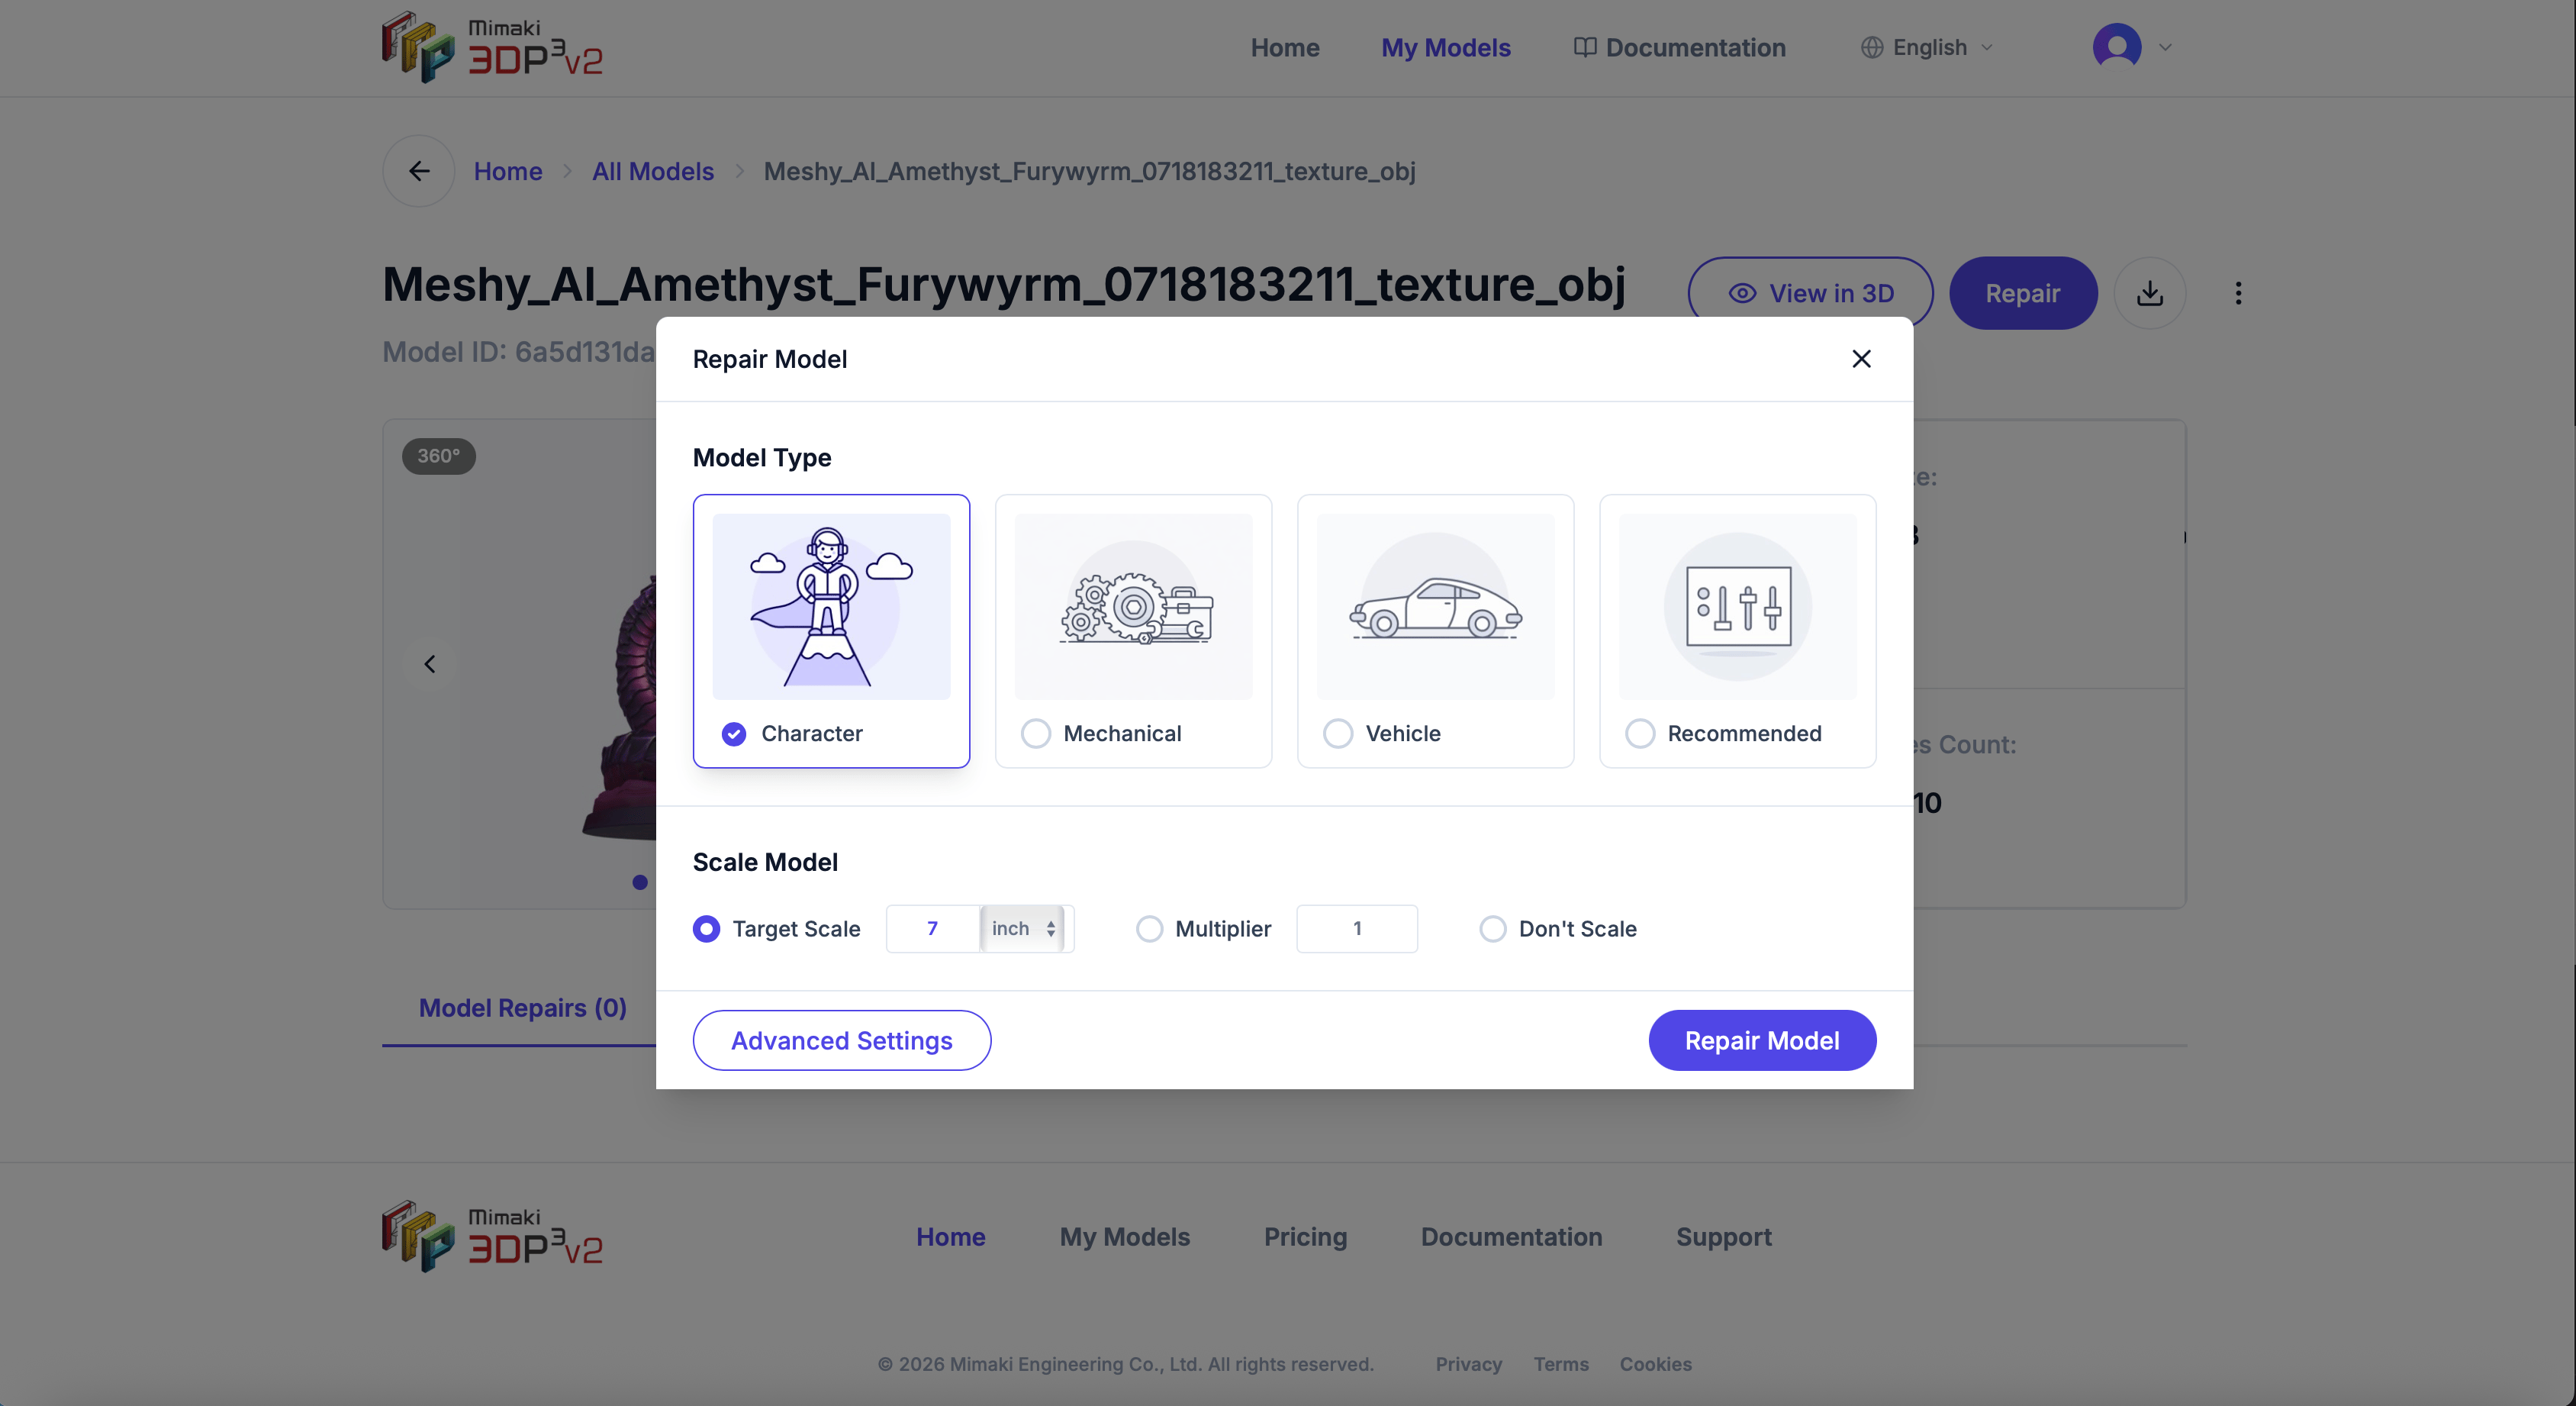 Select the preset that best matches your model:
* **Character** — Figurines, characters, organic shapes
* **Mechanical** — Engineering parts, brackets, functional prints
* **Vehicle** — Cars, aircraft, vehicles
* **Custom** — No preset, full control over settings
Choose how to size your model:
* **Target dimension** — Set the longest side to a specific size (e.g., 6 inches)
* **Multiplier** — Scale by a factor (e.g., 2x to double the size)
* **Don't scale** — Keep the original dimensions
Click **Repair Model**. A progress overlay shows the current stage and completion percentage.
Select the preset that best matches your model:
* **Character** — Figurines, characters, organic shapes
* **Mechanical** — Engineering parts, brackets, functional prints
* **Vehicle** — Cars, aircraft, vehicles
* **Custom** — No preset, full control over settings
Choose how to size your model:
* **Target dimension** — Set the longest side to a specific size (e.g., 6 inches)
* **Multiplier** — Scale by a factor (e.g., 2x to double the size)
* **Don't scale** — Keep the original dimensions
Click **Repair Model**. A progress overlay shows the current stage and completion percentage.
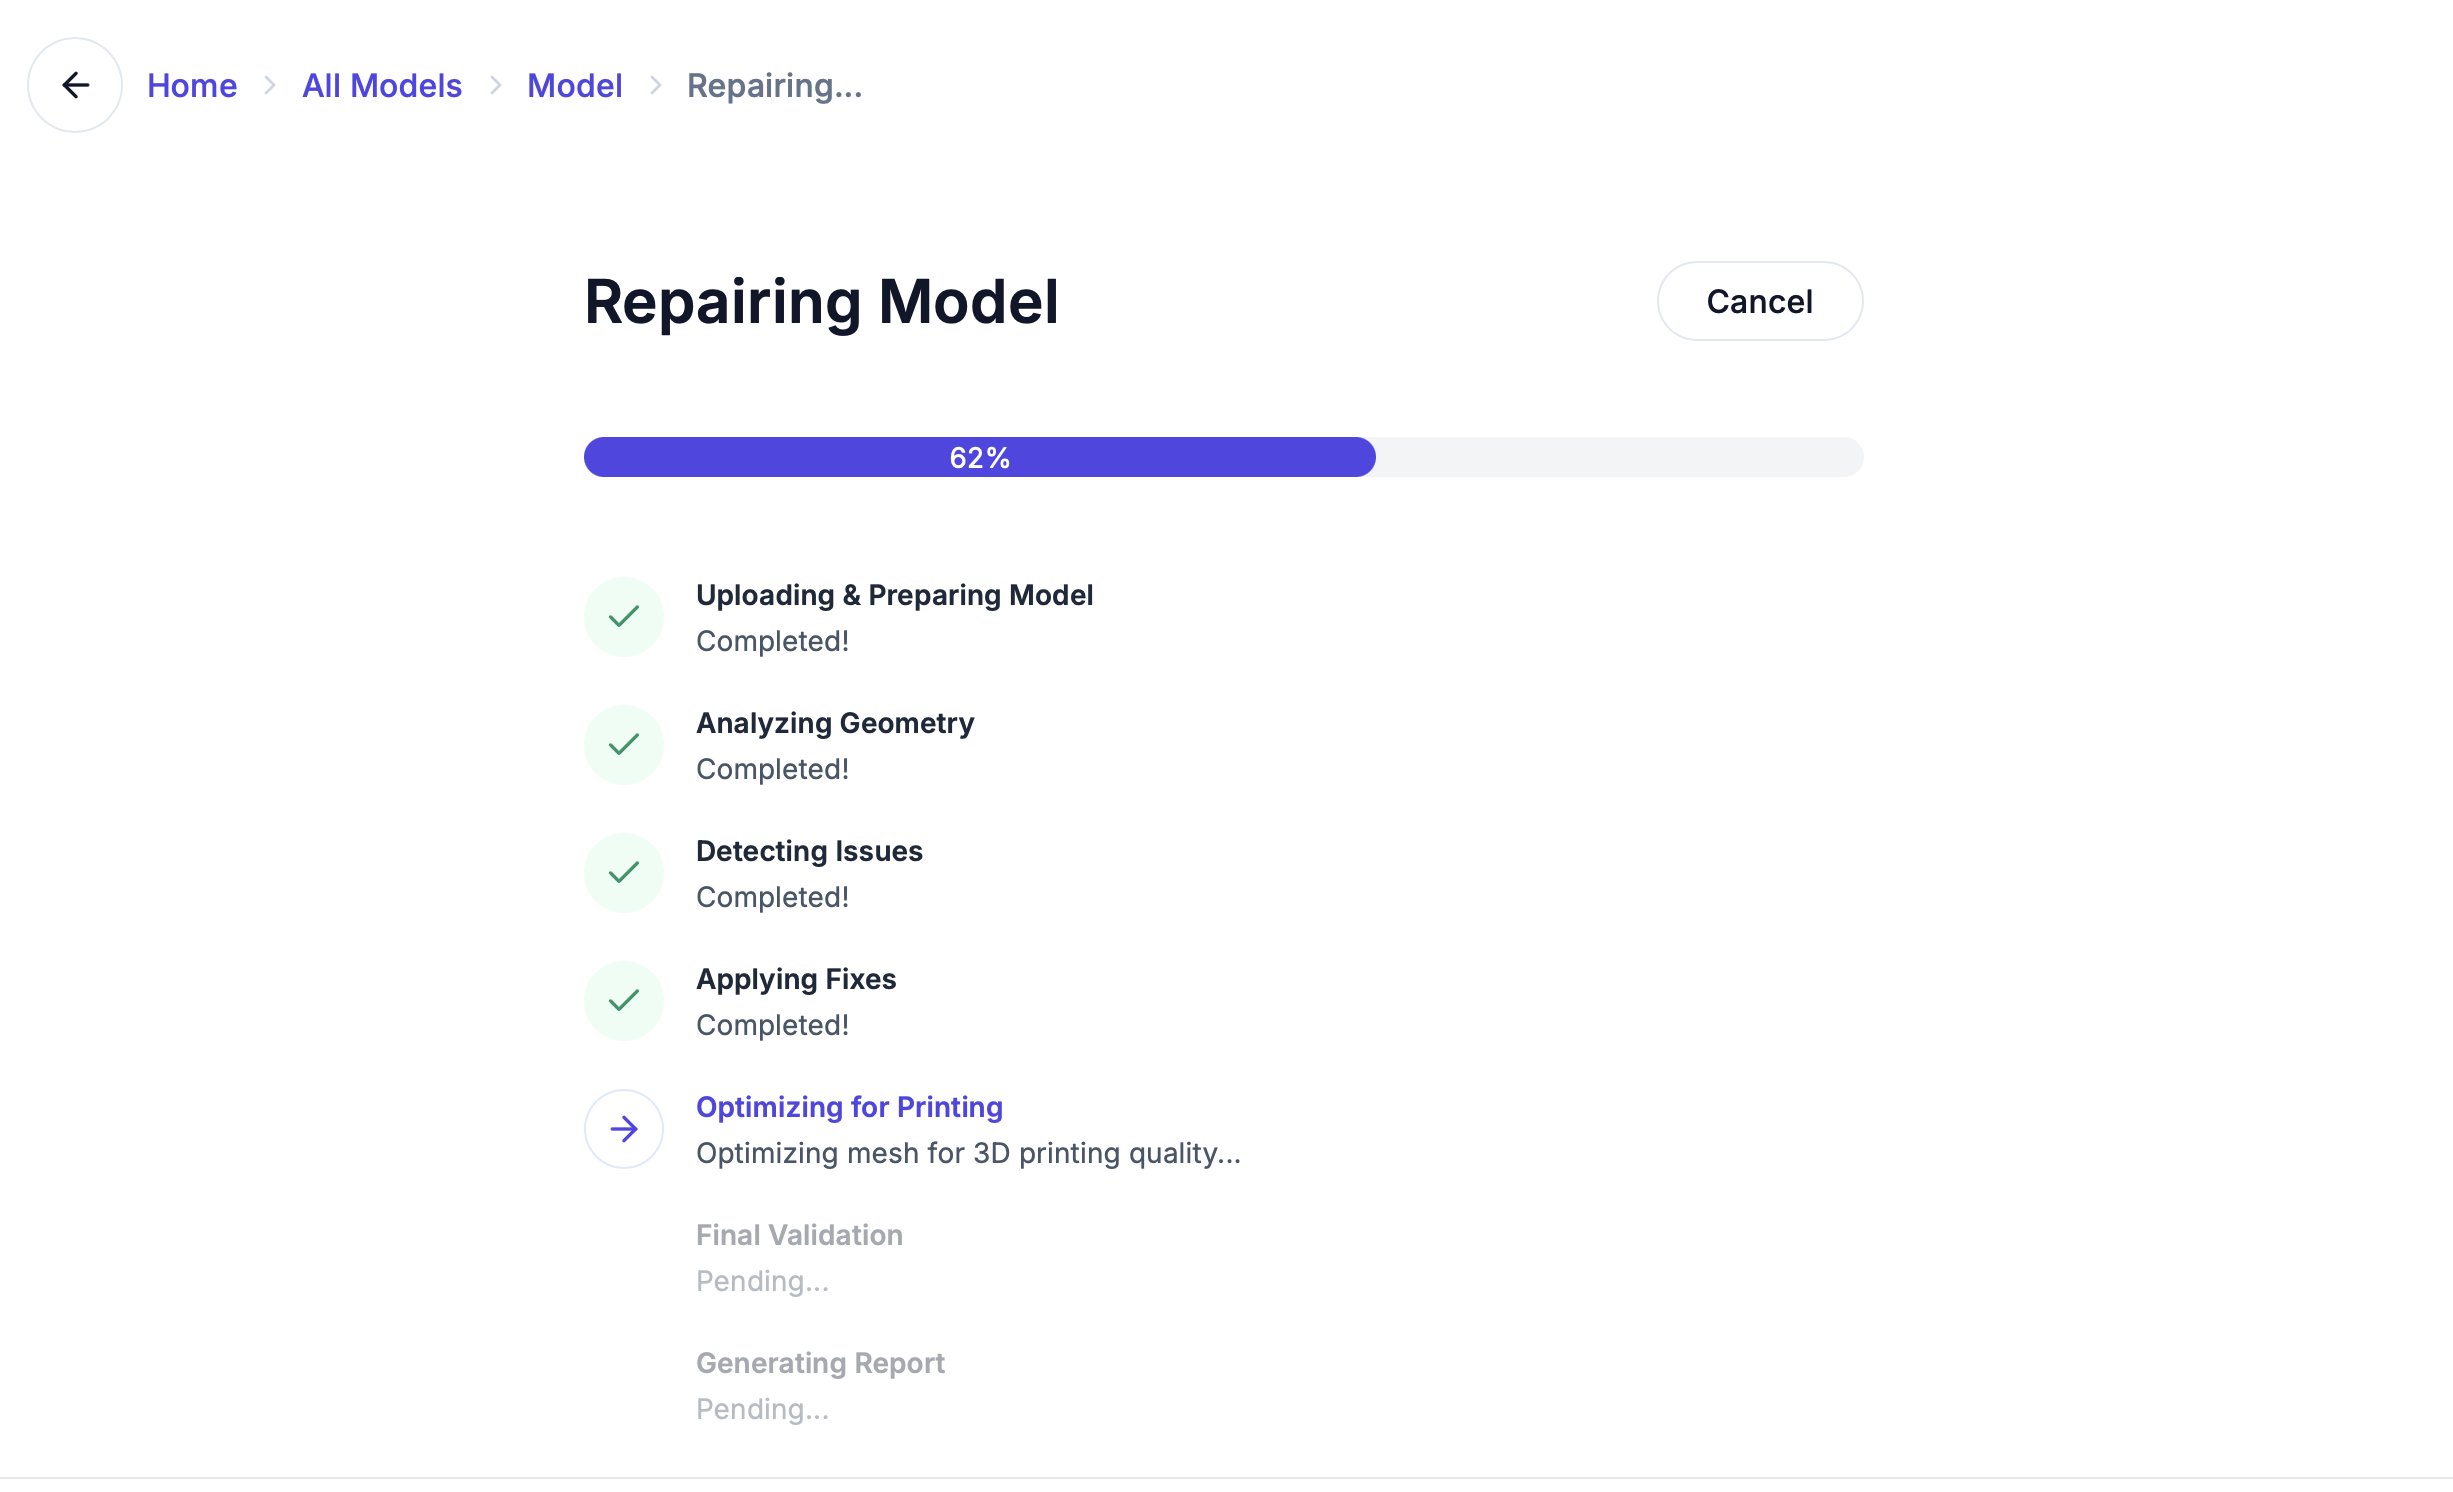 Repair quality is now set automatically — every repair runs at maximum detail, and medical DICOM scans use an optimized resolution.
When the repair completes, you're taken to the repair detail page where you can view the fix report, compare before and after, and download your print-ready model.
Not sure which preset to use? Start with **Custom** — it works well for most models. You can always re-repair with different settings.
Your first **2 repairs are free**. After that, you need a subscription to continue repairing. See [Plans and pricing](/account/plans-and-pricing).
Repair quality is now set automatically — every repair runs at maximum detail, and medical DICOM scans use an optimized resolution.
When the repair completes, you're taken to the repair detail page where you can view the fix report, compare before and after, and download your print-ready model.
Not sure which preset to use? Start with **Custom** — it works well for most models. You can always re-repair with different settings.
Your first **2 repairs are free**. After that, you need a subscription to continue repairing. See [Plans and pricing](/account/plans-and-pricing).