> ## Documentation Index
> Fetch the complete documentation index at: https://docs.3dpreppro.com/llms.txt
> Use this file to discover all available pages before exploring further.
# Scale
> Resize your model to the exact print dimensions
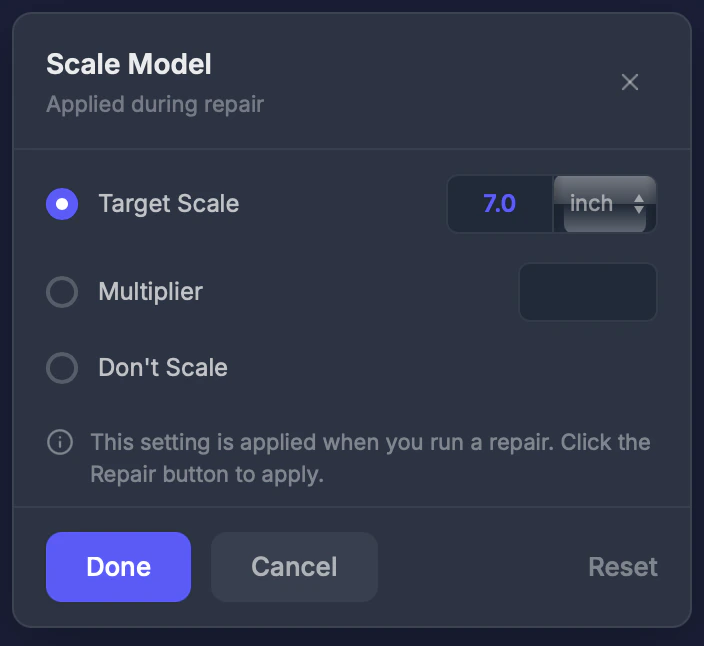 Scale lets you resize your model before repair. Set a target dimension, multiply by a factor, or keep the original size.
## When to use this
When your model needs to be a specific size for printing — for example, a figurine that should be exactly 6 inches tall, or a mechanical part that must be 50 mm wide.
## Settings
### Scale mode
* **Target Scale** — Set the longest side to a specific size
* **Multiplier** — Scale by a factor (2x doubles, 0.5x halves)
* **Don't Scale** — Keep original dimensions
### Target value
The desired size when using Target Scale mode.
### Unit
Choose between millimeters (mm), centimeters (cm), or inches.
## Step by step
Click **Scale** in the toolbar.
Select Target Scale, Multiplier, or Don't Scale.
Type the target size or multiplier.
Scale is a pipeline tool — it takes effect when you run a repair.
## Tips
* The editor shows a bounding box preview so you can visualize the new dimensions
* Check your printer's maximum build size before scaling up
* Use the [Object Info](/editor/tools/object-info) tool to see current dimensions
Scale lets you resize your model before repair. Set a target dimension, multiply by a factor, or keep the original size.
## When to use this
When your model needs to be a specific size for printing — for example, a figurine that should be exactly 6 inches tall, or a mechanical part that must be 50 mm wide.
## Settings
### Scale mode
* **Target Scale** — Set the longest side to a specific size
* **Multiplier** — Scale by a factor (2x doubles, 0.5x halves)
* **Don't Scale** — Keep original dimensions
### Target value
The desired size when using Target Scale mode.
### Unit
Choose between millimeters (mm), centimeters (cm), or inches.
## Step by step
Click **Scale** in the toolbar.
Select Target Scale, Multiplier, or Don't Scale.
Type the target size or multiplier.
Scale is a pipeline tool — it takes effect when you run a repair.
## Tips
* The editor shows a bounding box preview so you can visualize the new dimensions
* Check your printer's maximum build size before scaling up
* Use the [Object Info](/editor/tools/object-info) tool to see current dimensions